Improve Your Video Quality to Increase Student Engagement

Jul 23, 2021
By:  Tina Riedy
Improve Your Video Quality to Increase Student Engagement
This article is adapted from an E-Campus workshop and a conference session the author provided for the 2021 Ohio Educational Technology Conference.
Including high-quality, engaging virtual lectures in online courses can increase instructor presence and positively impact student engagement and satisfaction. However, as experts in their respective academic fields, college and university faculty can’t also be expected to be experts in video production and technology! Fortunately for all of us dedicated to online teaching and learning, we can utilize a few quick and easy strategies to improve the video quality of both our live-virtual lectures and recorded lecture videos.
How do I know? This subject is a passion project for me, combining my two great professional loves: video/multimedia production and adult learning best practices. This article will explore the basics of video production and technical jargon in the context (and practical application) of higher education lectures. These tips were strategically selected because they are easy to use, do not require any additional hardware or software (read: free!), and can result in a more professional and engaging video recording.
Let’s get started! It all comes down to how it looks and how it sounds.
VIDEO BASICS: HOW IT LOOKS
Composition
The composition of your frame (the “frame” being the visual boundaries of your video recording, i.e., anything in front of your camera that your camera can capture) includes two major elements: setting and subject.
Setting (Surroundings & Background)
Surroundings
Sometimes we may feel like we have to tidy up our whole room or office before recording a video. That is not true! You aren’t presenting your entire room, just what the viewer can SEE. Ask yourself, “What’s behind me?” Organize that messy bookshelf. Turn your camera so it doesn’t capture that open closet. Relocate to a different location with a nicer background for the duration of the recording and return to your typical workspace afterward.
Why? Because messy backgrounds are distracting. The viewer/student will be busy looking at your cluttered bookshelf, kitchen, closet, etc., instead of focusing on you, the subject of the video lecture. Dynamic movement, such as other folks or pets in your household moving around behind you while you talk, is EXTRA distracting. Viewers (in our case, students) will always look at moving objects in videos.
To tidy up your frame, move your messy stuff out of view or transfer your camera to a different location. Sometimes moving your camera even one inch can change your frame dramatically. Your whole room doesn’t have to be tidy, just what the viewer/student will see.
Quick Tip: You can have “stuff” in your frame that still looks organized and intentional, e.g., a full but orderly bookshelf, a wall of abstract paintings, a shelf of plants, a curtain with a soft or subtle pattern, etc.
Background
Texture is good! Good backgrounds include tidy bookshelves, a wall with simple art, plants, drapery/curtains, wood/brick, etc.
Avoid posters and decor with text in your frame as they can be distracting for students. It is a “Film Production 101” fact that any time there is text on screen, the viewer will read it. Unless it directly pertains to your lecture, replace that inspirational quote on the wall with a painting or photograph.
Your background should never match your outfit or skin tone. We’ll cover this more later when discussing clothing options, but please avoid this scenario: a beige skin tone wearing a beige shirt with a beige wall in the background. It will look like a wall with eyeballs is giving the lecture! This tip applies to all skin tones - you don’t want to ‘disappear’ into your setting.
Subject (You!)
In film terms, the subject of the video is YOU! Although you are discussing academic subject matter in the video lecture, you are the physical subject and presenter of the content. That means you’re the director and the star! As such, it’s important to consider how you will look in your video - both where you are in the frame and how your clothing complements the setting.
Camera Framing
There are two video standards to cover regarding where to place the subject in a frame: headroom and the rule of thirds.
- Headroom is the distance between the top of your head (or hair) and the top of the screen. If you have tall hair, use the round crest at the top of your head or lower hair as the guide. It’s a video standard to leave headroom space equal to 10% of the frame’s height.
- Quick Tip: To achieve proper headroom, tilt your camera forward or backward (up or down) and/or adjust the height of your chair. If your camera is on your laptop, use a stack of books to raise your computer for the duration of the recording. Make sure when you’re tilting your laptop screen forward or back to adjust for proper headroom, the viewer can’t see your keyboard. If your laptop has been lifted too high, remove a book or two! If it’s too low, add a book or two.
- Rule of Thirds Now, where should you sit in the frame? Most of the time, you should sit right smack dab in the middle (while keeping the proper headroom described earlier). Remember, you are the subject, and sitting in the middle of the frame will draw all of the viewer’s attention to you. The standard “mid-shot” of a person during a video lecture includes the subject’s head, shoulders, and some of their chest. If you are standing or using a whiteboard, the viewer will most likely see more of your body, and that is perfectly acceptable. If you want to add graphics to your video in post-production (either by yourself or with the help of E-Campus), sit on either the right or left side of the screen when recording (while still following the rule of thirds).
Clothing
Okay, so you’ve got your composition correct with the appropriate headroom, and you are sitting in the right location. Now, what should you be wearing?
- Avoid tight stripes, like pinstripes. For very fancy computer science reasons, tight stripes often get recorded by video cameras in a psychedelic way (called the Moiré effect) that can distract viewers.
- Wear solid colors, color blocks, big patterns, and/or colors that contrast with your skin. Remember the warning before: don’t wear clothes that match your skin tone and/or the wall behind you. If you do, you’ll disappear!
- Avoid wearing anything that will reflect light in odd ways, e.g., sequins or metallic fabrics.
- Definitely show off your personality with your clothing choices. This is a great way to remind your students that you’re a real person!
- Absolutely match your outfit to the subject matter. Are you talking about the history of LGBTQ+ rights? Wear a rainbow button-up! Talking about chemical compounds? Wear a witty chemistry t-shirt under an open blazer.
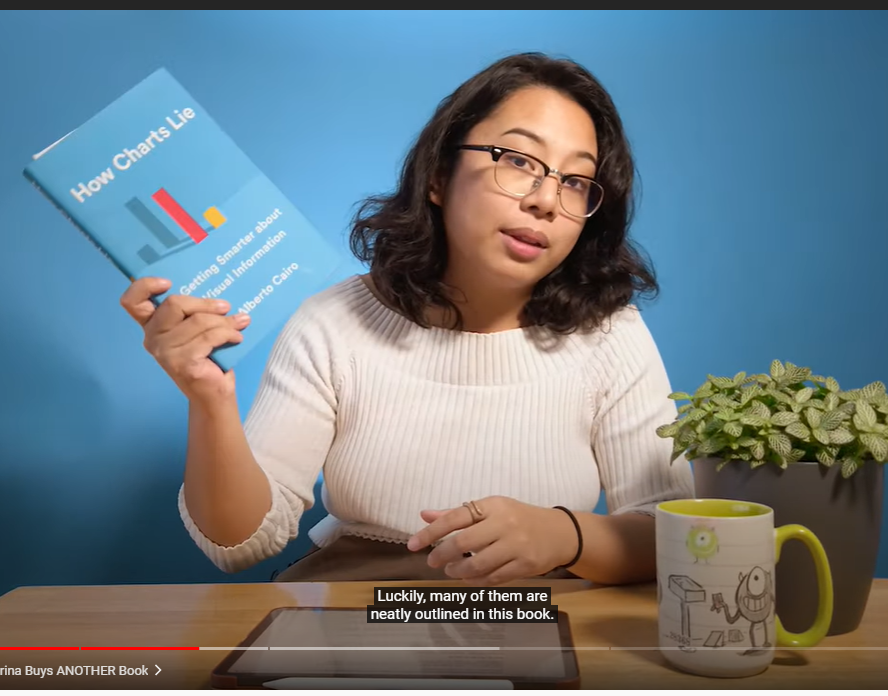
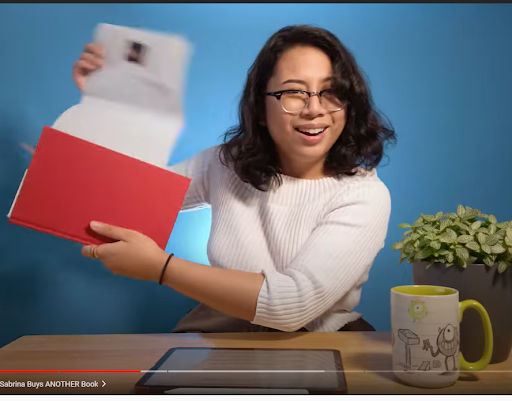
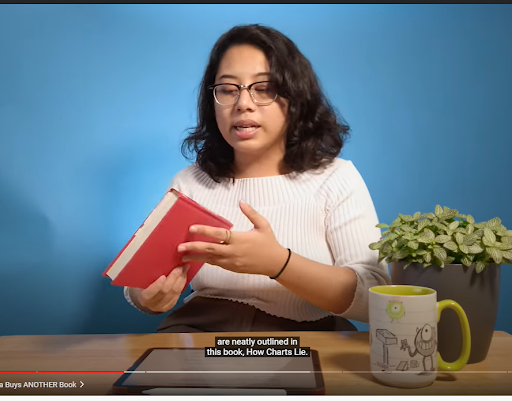
A great example of background contrast is in the video “Can you read graphs?” by Sabrina. In the middle of her recording, the presenter realizes that her book cover matches her background (blue on blue), so she removes the dust jacket to reveal a red book underneath.
Lighting
Adjusting lighting is the quickest and easiest way to increase your video’s professional look.
Remember, the focus should be on you…, so light your face! The light (sunlight, lamps, ring lights, etc.) should go in front of your face, not behind your back. If your background is brighter than your front/face, that means you are “backlit,” which can make you look more like you’re giving an interview from witness protection than presenting to your students. Take the focus off the background and put it on you by lighting your front/face. The background should never be brighter than the subject.
Quick Tip: Got a fancy ring light? Your camera goes in the MIDDLE of the ring, so when you look at the camera, your face is evenly lit all around.
Video Quality
Before you record your video lecture, check your settings to see if you can choose your video quality. You want to choose either 1280x720 (no smaller or else it will look outdated and grainy) or 1920x1080 (no larger or else the file will take up too much space on your computer and in Canvas, and some students may not be able to load it quickly or at all). Both of these options are HD (high definition). Some software and cameras boast about having 4K+ capabilities, but that is not necessarily a good thing considering the sizable amount of space 4K+ takes up on your computer. Besides, I don’t necessarily want my students to see the microscopic mites that live on my eyelashes...
Line of Sight
So your lighting is good, you’ve chosen the proper outfit and video quality, you’ve got the appropriate headroom, and you’re sitting in the right spot in the frame. Now, WHERE do you look when you lecture? The answer: directly into the camera.
The camera is the “eye” of the audience. In your case, the camera is your student, so look at them by looking at it. If you keep your eyes on the camera, it will appear to your viewers/students as if you are looking right at them, giving them your attention, and speaking directly to them. If you have to look away to demonstrate something, utilize a whiteboard or prop. It’s perfectly fine to glance occasionally at your presentation when necessary, but always return your eyes to the camera.
Quick Tip: If you’re nervous about talking to a camera, place pictures of family, friends, or students next to your presentation or set picture frames next to your laptop/camera. Talk to the photos as if you were actually talking to the people in them.
VIDEO BASICS: HOW IT SOUNDS
Audio Quality
Microphone or “mic” placement is crucial. You don’t want it too close, or you’ll pick up on mouth noises (gross), but you will sound distant, quiet, and possibly unintelligible if the mic is too far. So what’s the proper distance of mic to mouth? About 6 inches is right on the money. You can roughly measure this distance by holding your thumb and pinky finger away from each other (like the shaka or “hang loose” hand sign), then place your thumb near your lips and your pinky near your mic. That is the proper distance.
Often, however, our mic is attached to our laptop or sitting on our desk. What should you do then? Favor the “look” (follow all the rules of “look” written above) and then adjust for sound. Keep your mic lower than your face because your voice naturally projects downward when you look at your notes.
Background Noise
Keep papers and notes away from your mic while you record. Papers rustling over or on your mic ruin the recording of what you’re saying and can distract students, and there is no way to remove these sounds using audio editing software.
Avoid typing during your recording. Brief clicks or taps on an arrow key to advance slides are expected and acceptable in the context of a video lecture.
Turn off fans/dishwashers/kids/dogs (when possible) to minimize the noise in your surrounding area. Avoid recording while the trash collectors are out or while your neighbor is mowing the lawn.
Speak Clearly & Include Captions
Speaking clearly is just as beneficial in video lectures as it is face-to-face. Students will understand you better and retain more information. Additionally, there is an added benefit to speaking clearly in a video lecture: the artificial intelligence that generates auto-captions will significantly improve its accuracy if you enunciate. That means there will be fewer caption edits for you to make before delivering the video to your students. Speaking clearly enhances the audio quality of your recording and equals less work in the long run!
Why Captions are Critical
Ensure Accessibility
- To accommodate a hearing disability
- To focus or understand the language
You can find more information on captions, subtitles, and transcripts on the AccessMU Media Captioning page.
Enhance Understanding
- To watch a video in noisy/quiet environments
- Captions help with comprehension of dialogue, clarification of terminology, concentration, and engagement
In fact, according to a UK study, 80% of television viewers used closed captions for reasons other than hearing loss.
Increase Engagement
According to PLYMedia, subtitled videos increase view time by more than 12% and are watched an average of 91% to completion. In comparison, videos without subtitles are only watched 66% to completion. When subtitles are included, 80% more people watch videos to completion!
Want to learn how to add captions to your YouTube videos? See our E-Campus article: How-To: Add Closed Captions to YouTube Videos.
Tone
Use a conversational tone, just as you would if you were explaining things to students in the classroom. Students want to see you speaking passionately about your subject matter, so remember to keep the passion in your delivery!
The easiest way to do this is to smile while you speak. (Really! Try it!) Smiling makes your voice sound brighter and full of energy, even if you woke up on the wrong side of the bed that day. If you sound exhausted or bored, it comes through in your voice a hundredfold. The same can be said for enthusiasm and energy. If you’re excited to teach (or at least sound like you are), your students will feel it and hopefully respond in kind!