
How-To: Share and Annotate Content in Zoom Meetings


By:  Gracia Ostendorf
How-To: Share and Annotate Content in Zoom Meetings
Zoom is a video conferencing tool that you can use to hold virtual meetings and class sessions with your students. In a Zoom meeting, you can share your screen to show students presentations, files, or other applications open on your computer. You can also use the whiteboard and annotation features to create a virtual whiteboard that your students can see (and interact with if you choose) during your meetings or lectures to explain concepts.
Downloading the Zoom Desktop App
Zoom can be accessed both through your web browser and through the Zoom app that you download to your computer or device. However, you must use the Zoom desktop app in order to use the whiteboards and annotation features.
You can download the desktop app from Zoom’s website and follow the instructions on your device to complete installation and setup. When prompted, log in to Zoom using your Miami email address and password. (Note: If it is your first time logging into the Zoom desktop app, choose "Sign In with SSO." Type "miamioh" in the box, click "Continue," and then complete the login process as usual with Duo).
Need guidance getting started with Zoom meetings? Learn how to schedule, start, and share Zoom meetings in Canvas first.
Sharing Your Screen in a Zoom Meeting
Screen sharing is helpful to show students presentation slides, walk through a document together, or visually share and explain files, web pages, or other applications on your computer during your meeting.
To share your screen:
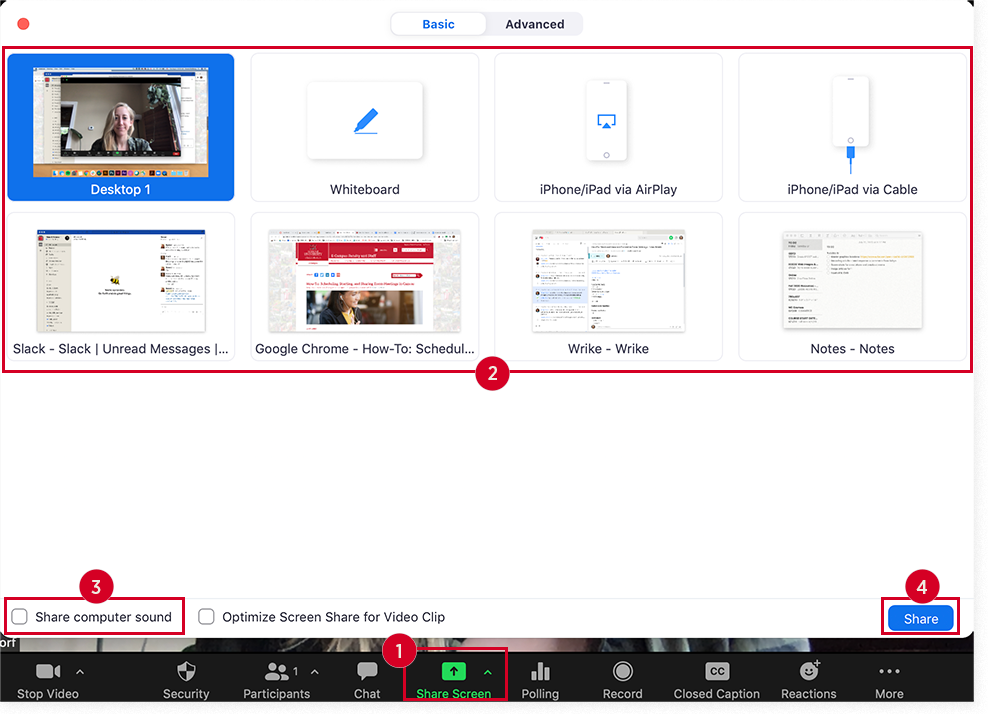
- In your Zoom meeting, click the “Share Screen” button at the bottom of the meeting window.
- Choose what you’d like to share in the new window that opens:
- Choose "Desktop" to share all applications and windows open on your computer desktop.
- Choose a specific application from the options provided (e.g. Google Chrome) to only share a single window or application that is currently open on your computer.
- If you’ll be sharing and playing a video or audio with your students, check the “Share computer sound” box in the lower left-hand corner.
- Click “Share” to start sharing.
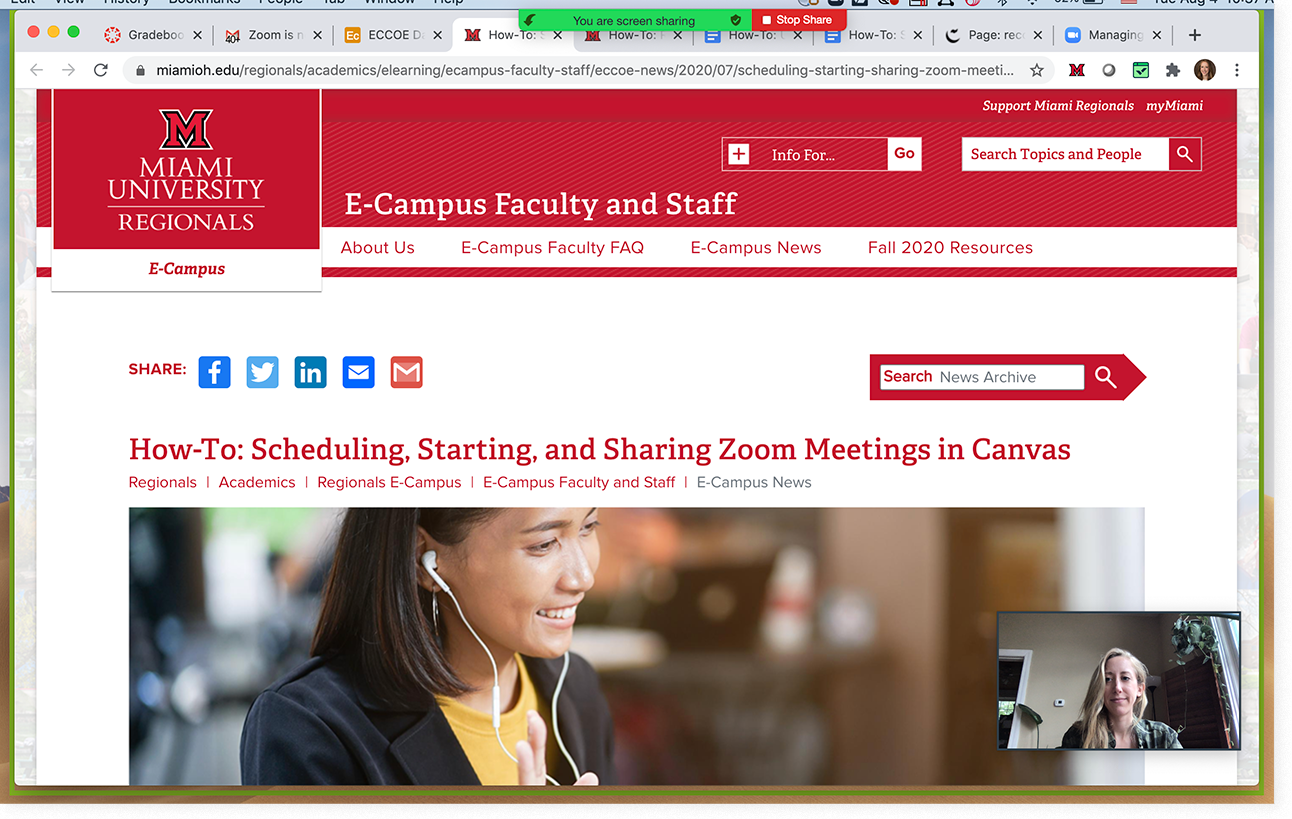
- A green outline will appear around the content you’re sharing, and your Zoom menu will move to the top of your screen. To stop sharing, click the red “Stop Share” button.
Annotating a Shared Screen in a Zoom Meeting
Annotating your screen can be helpful if you are trying to draw students’ attention to specific areas of the screen as you explain or narrate, or write notes and annotations around the content being displayed.
To annotate on a shared screen:
- Share your screen using the steps above.
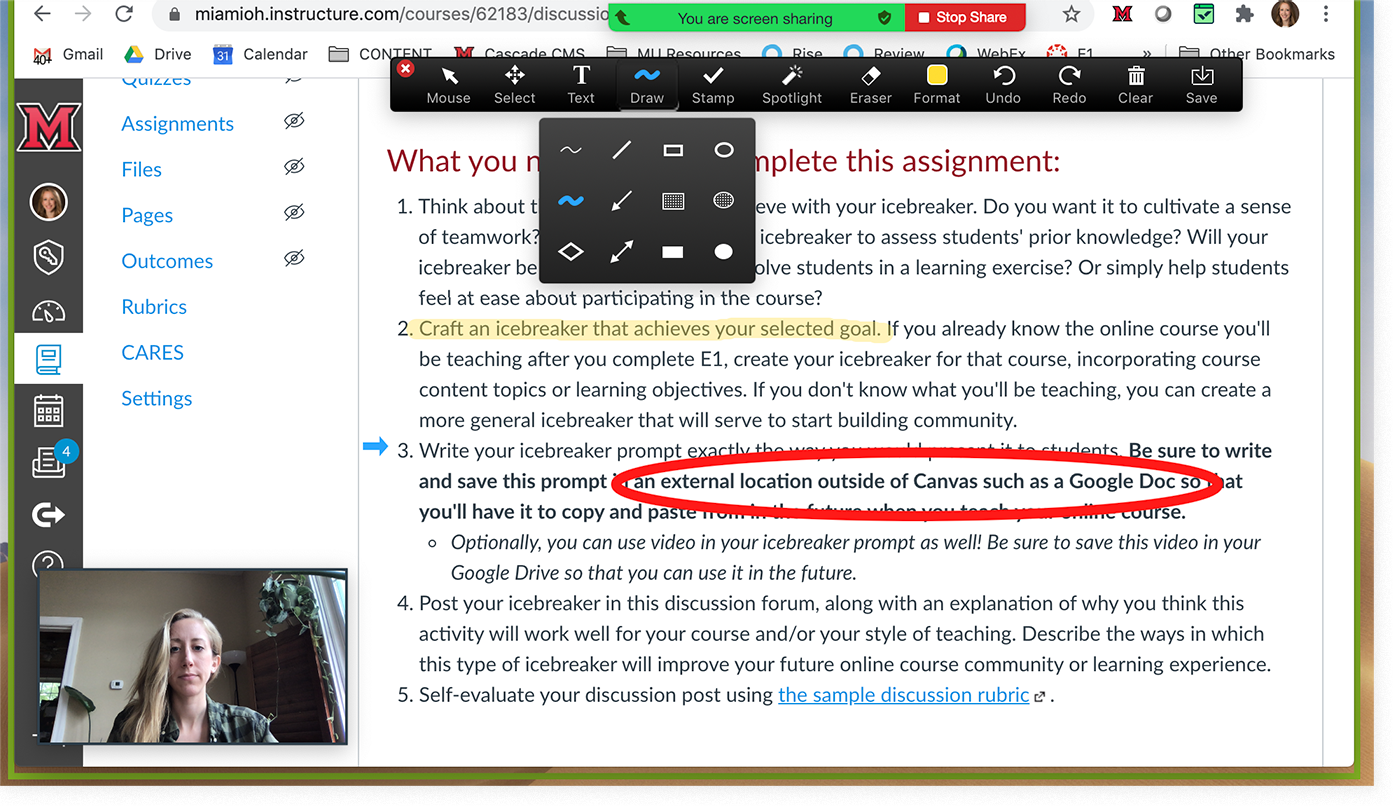
- Click “Annotate” in the toolbar at the top of the screen.

- A new menu bar will open with a variety of annotation tools you can use, such as text, drawing, stamps, and spotlights. For more information on the uses of each of these tools, take a look at Zoom’s guide on annotation tools.
Sharing, Annotating, and Saving a Whiteboard in a Zoom Meeting
You can also share a virtual whiteboard in a Zoom meeting, giving you a virtual blank canvas on which you can write, draw, and annotate during your meeting.
To share and annotate a whiteboard:
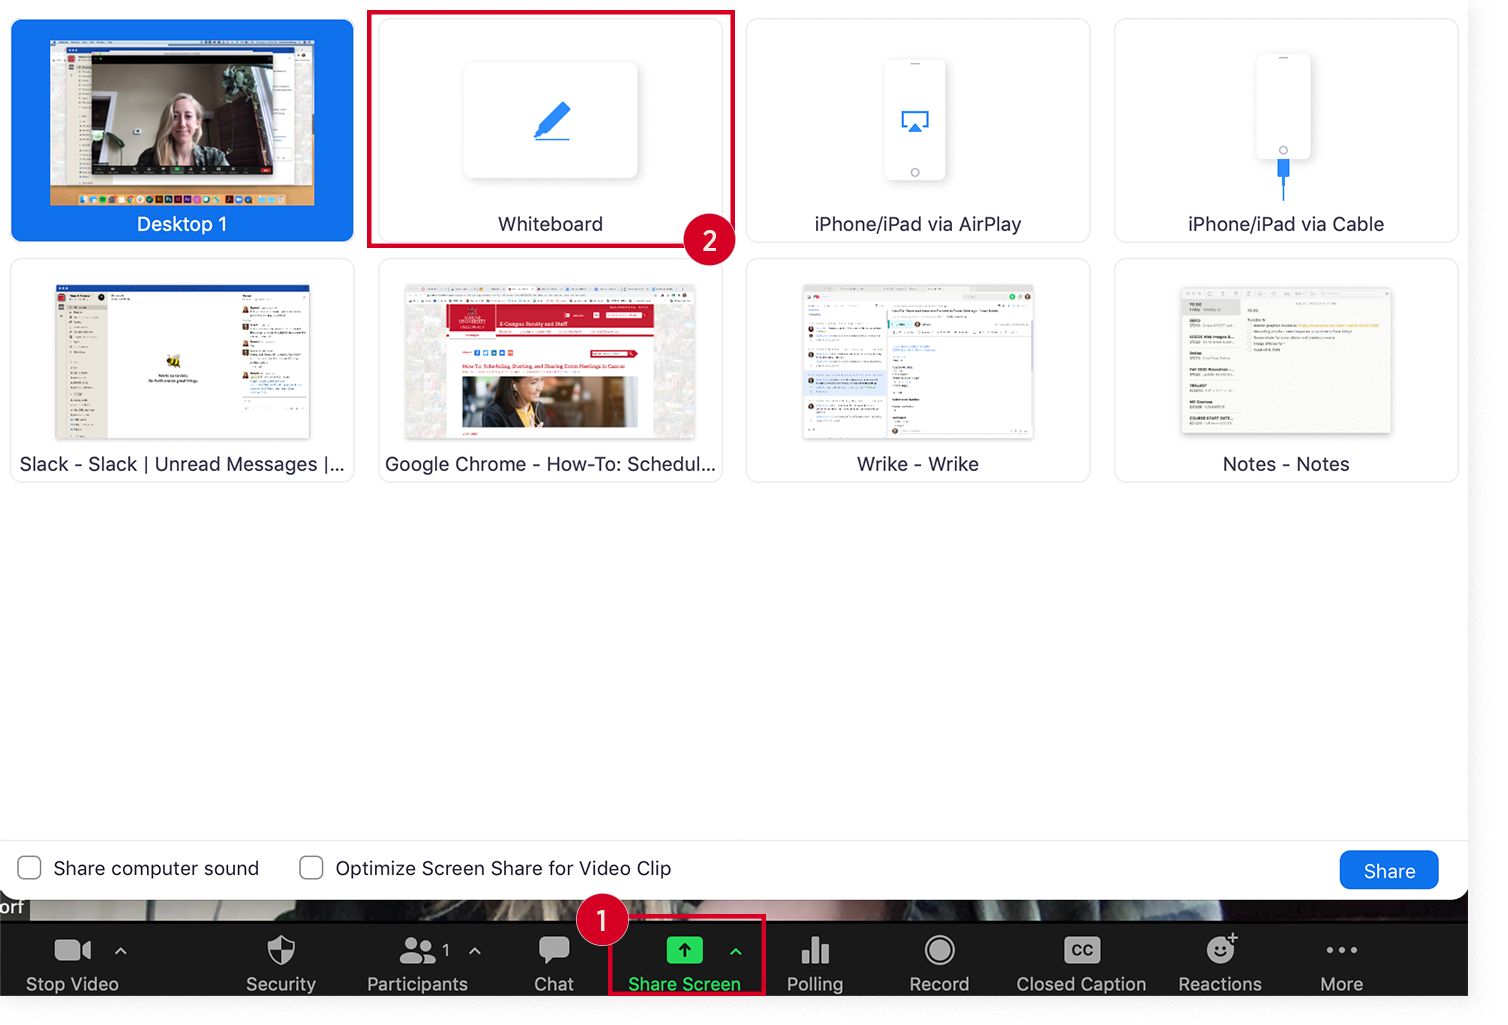
- In your Zoom meeting, click the “Share Screen” button at the bottom of the meeting window.
- Click “Whiteboard.”
- A new whiteboard will appear, as well as a new toolbar with annotation tools. Use the annotation tools to type, draw, and highlight content on the whiteboard.
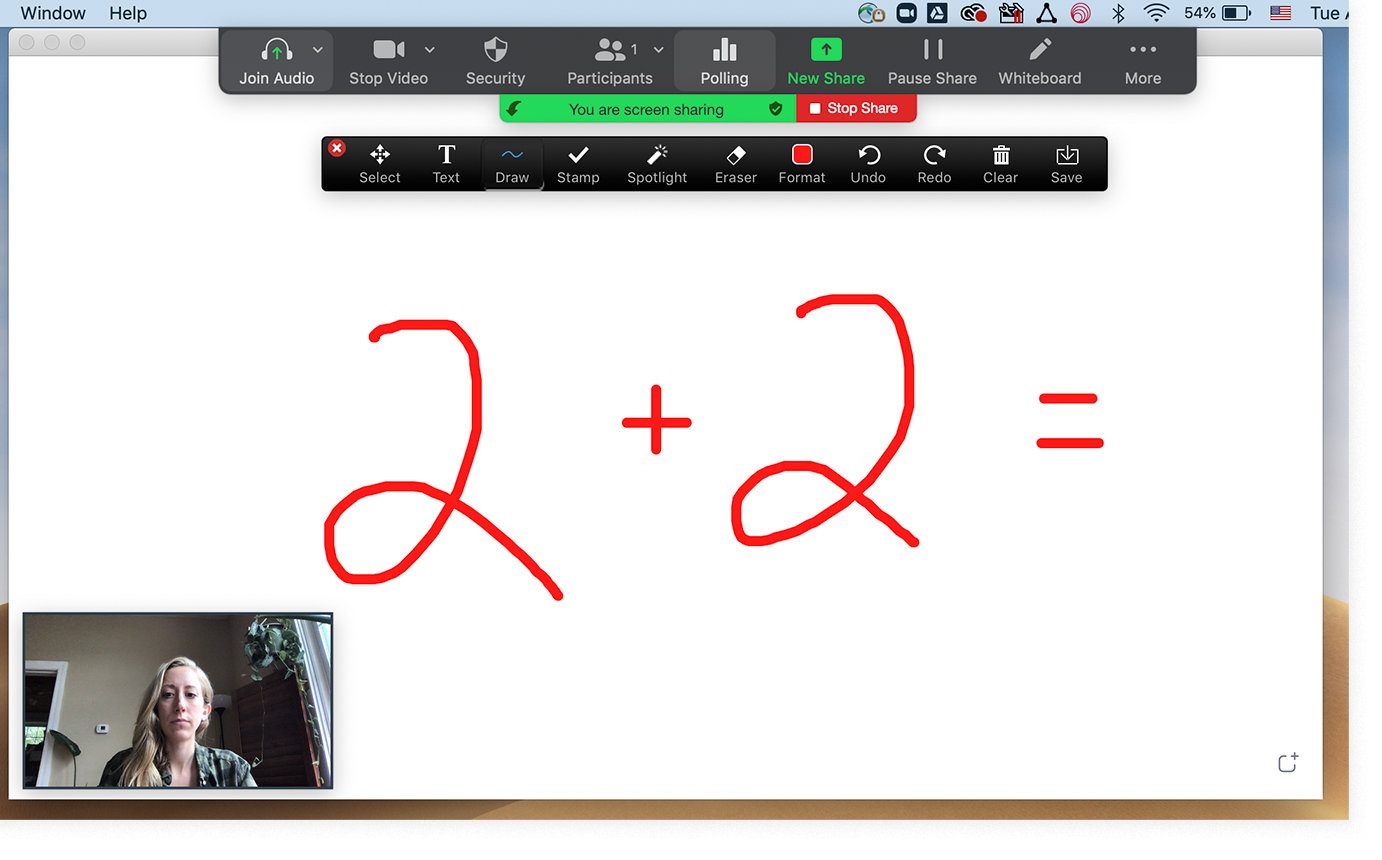
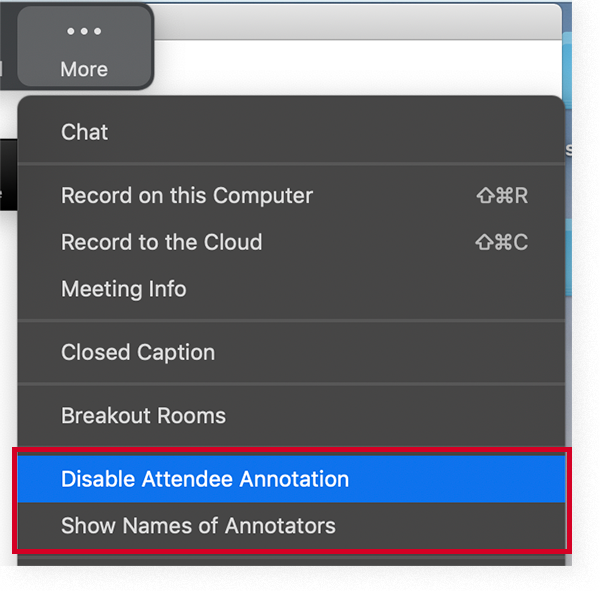
- To allow or disable participants to annotate the whiteboard, hover towards the top of the screen until your Zoom menu appears. Click the “...More” button.
- On the menu that appears, you can choose to “Disable/Enable Attendee Annotations,” and to “Show/Hide Names of Annotators.”
- If you wish to download a copy of your whiteboard as an image, click the “Save” button on the annotation toolbar. The image will save in the “Zoom” folder within your computer’s Documents folder.

If you’d like to share this image with your students, you can upload it to your Canvas course files, then insert a link to the file within a Page, Announcement, or anywhere else where you can use the Rich Content Editor in your Canvas course.
You can find additional information about sharing your screen in the following Zoom guides:


