Give Your Canvas Course an Accessibility Check-Up
Give Your Canvas Course an Accessibility Check-Up
An earlier version of this article mentioned April 24 as the deadline for updates to Title II regulations. Please note that as of April 20, 2026, the Department of Justice has extended the Title II deadline to April 24, 2027.
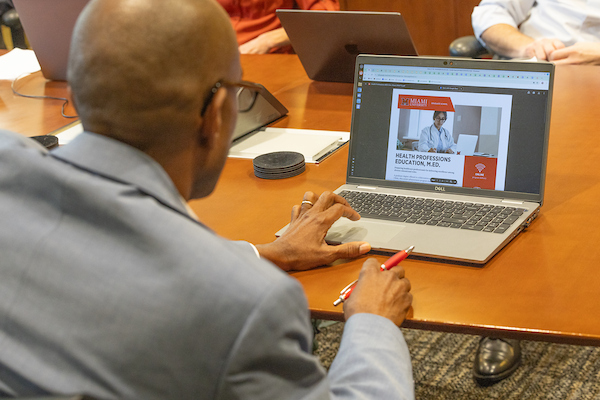
Welcome to the latest installment of our guides for creating and maintaining accessible content for Canvas courses! Ensuring your course materials are inclusive is vital for student success, but finding every accessibility issue manually can be time-consuming. Follow along here for tips on how to use the Ally Accessibility Report to improve accessibility in your course materials.
Introducing: Ally Accessibility Report
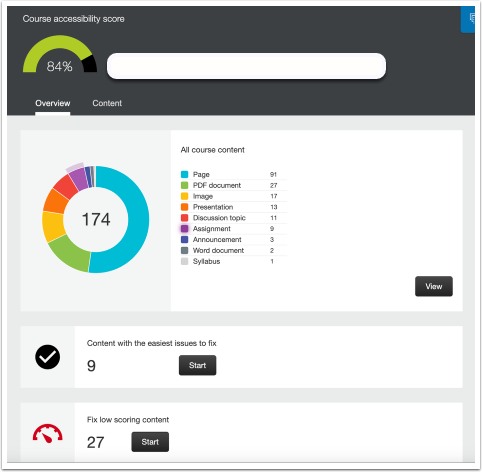
The Ally Accessibility Report scans your course content and provides an overall percentage score of the accessibility of your coursework. It identifies inaccessible files and offers step-by-step instructions on how to fix them. Importantly, this report is only visible to you (Teacher and Designer roles)—students cannot see this score.
The report helps you identify and fix common barriers, such as:
- Missing Alt Text: Images that lack descriptions for students using screen readers.
- Poor Color Contrast: Text that is too light or does not stand out clearly against the background.
- Confusing Links: Hyperlinks (like "click here") that do not tell the student where the link leads.
The Ally Accessibility Report helps you save time, especially in crucial moments such as the beginning of the semester when you’re preparing your courses in Canvas (a busy time for us all!).
Add the Report to Your Course Navigation
If you do not see the Ally Accessibility Report link in your course navigation, follow these steps to turn it on:
- Open your course and click Settings.
- Click the Navigation tab at the top.
- Locate “Ally Accessibility Report” in the list. Drag it up from the bottom section to the top section.
- Scroll to the bottom of the page and click Save.
- Refresh your page. The link will now appear in your course menu, visible only to the instructor or course designer.
Run the Report and Improve Your Score
(For best results, remove or delete unused or outdated files from your course before running the report.)
Once the tool is active, click Ally Accessibility Report to see your score. The report scans all files in your course, including files that are not published.
To start fixing things:
- View Issues: Click on a specific issue type to see a list of files that need attention.
- Get Help: Click on a document. You will see buttons like "What this means" or "How to…" that give you step-by-step advice.
- Fix It: Follow the on-screen instructions to resolve the issue.
Replace Files Without Breaking Links
If you need to fix a file on your computer (like a Word doc or PDF) and re-upload it, ensure the new version has the exact same filename as the original. When you upload it via the Accessibility Report tool, it will automatically replace the old file throughout your course without breaking any existing links. (How convenient!)
Checking your accessibility score regularly is a quick, proactive way to ensure equitable access for all learners in your course.